Backdrops are not just decorative elements; they form the foundation of mood, style, and storytelling in professional photography.
Backgrounds influence how subjects are perceived, helping to point out:
- Tones
- Narratives
- Depth
Studio, outdoor, and home environments each demand distinct backdrop strategies to optimize composition and technical execution.
Let us talk about all of those in greater detail.
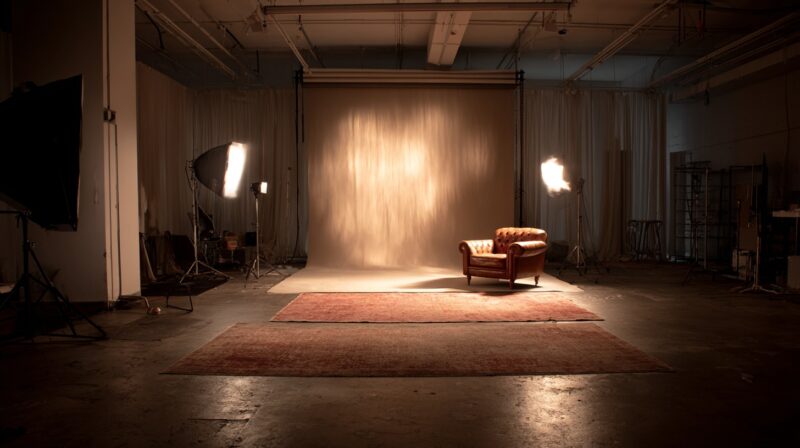
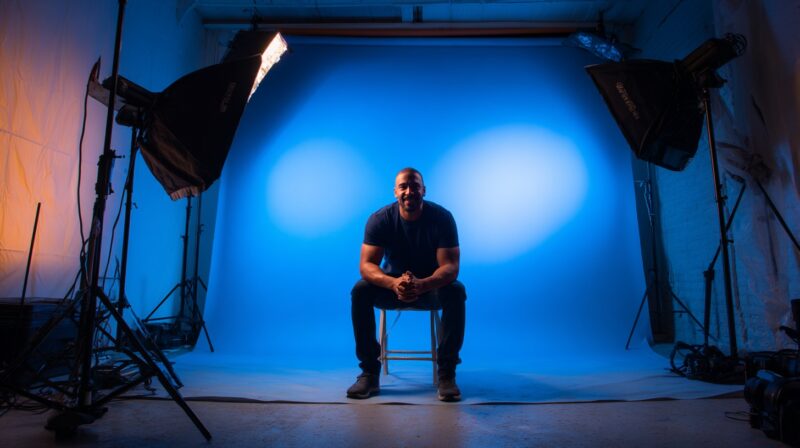
Studio Photography Background Setup
A ceiling height of 10 to 12 feet allows for optimal lighting configurations and backdrop clearance.
A gap of 1.5 to 3 feet between the subject and backdrop helps achieve natural separation and reduces shadow spill.
Eliminating ambient light leakage ensures consistency and precision in controlled lighting scenarios.
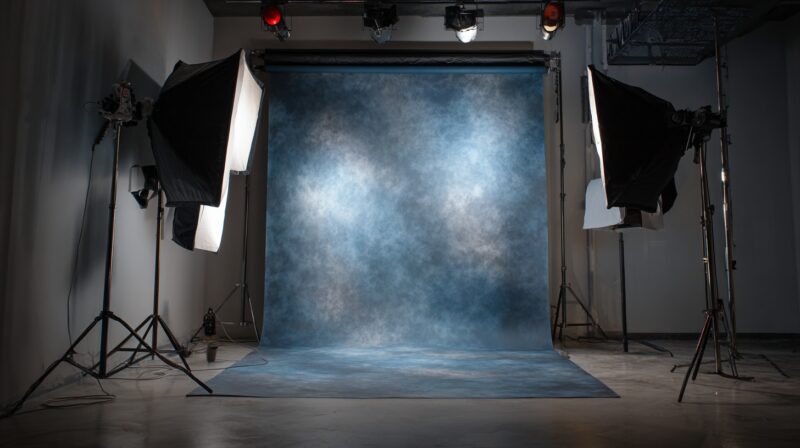
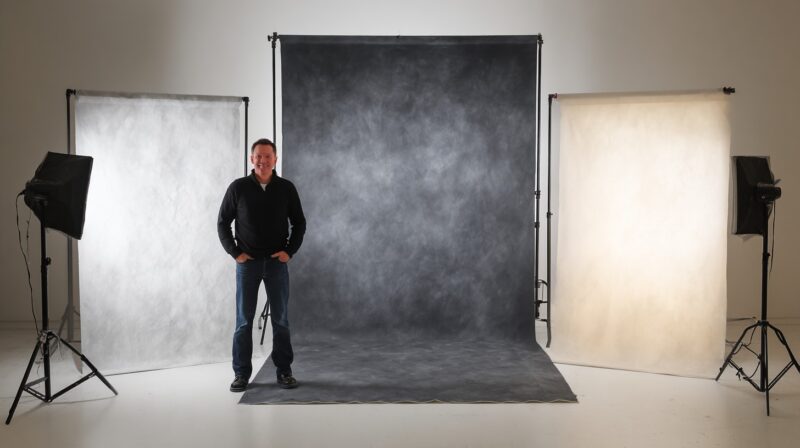
Backdrop Stand Systems
Choosing the right stand system involves evaluating the studio’s permanence, size, and versatility.
Telescoping crossbars supported by sturdy stands are ideal for mobile setups.
Wall-mounted and retractable systems save space and create a seamless workflow for high-volume studios.
Spring-loaded systems make swapping backgrounds quick and efficient. Stands should be weighted or stabilized, especially for wide or heavy backdrops like muslin or canvas.
- Telescoping stands: portable and adjustable
- Wall-mounted systems: permanent and space-saving
- Spring-loaded rollers: efficient background changes
- Stabilization: sandbags or base weights to prevent tipping
For photographers working with Gravity Backdrops for photography, stand compatibility and weight distribution should be evaluated to ensure sag-free mounting and ease of transition during sessions.
Lighting Integration
Light shapes perception, and in a studio, control is total. Strobes form the backbone of professional lighting setups.
Modifiers, such as softboxes and umbrellas, diffuse harsh light and soften shadows. Reflectors bounce light to fill in areas of contrast.
Gels introduce creative tones or correct color temperatures, allowing for a consistent aesthetic. A background light aimed at the backdrop can create gradients, halos, or separation to avoid flatness.
- Use of softboxes and umbrellas: to control softness and direction
- Reflectors: to bounce fill light and reduce contrast
- Gels: for color correction or creative effects
- Background lights: for separation and visual depth
- Rim lights: define edges and maintain focus
Positioning lights strategically prevents hotspotting and creates a dynamic yet balanced scene.
Backdrop Storage & Maintenance
Proper storage prolongs backdrop usability and maintains appearance. Hanging backdrops on rods or wall hooks prevents creasing and makes them readily accessible.
Rolling paper or vinyl backdrops onto cardboard tubes reduces edge curling and wrinkling.
Folding should only be reserved for cloth materials designed to withstand creasing.
To clean, use material-appropriate techniques:
- Microfiber: machine wash on delicate cycle and air dry
- Vinyl: wipe with a damp, non-abrasive cloth
- Canvas: spot clean only with soft cloth and mild solution
To remove wrinkles, use a steamer held at a safe distance, or for paper, apply minimal heat cautiously to avoid bubbling or tearing.
A well-designed studio environment blends technical efficiency with creative flexibility. Organizing equipment, integrating lighting, and preserving backdrops ensures that every shoot runs smoothly and delivers high-quality results.
Outdoor Photography Background Setup
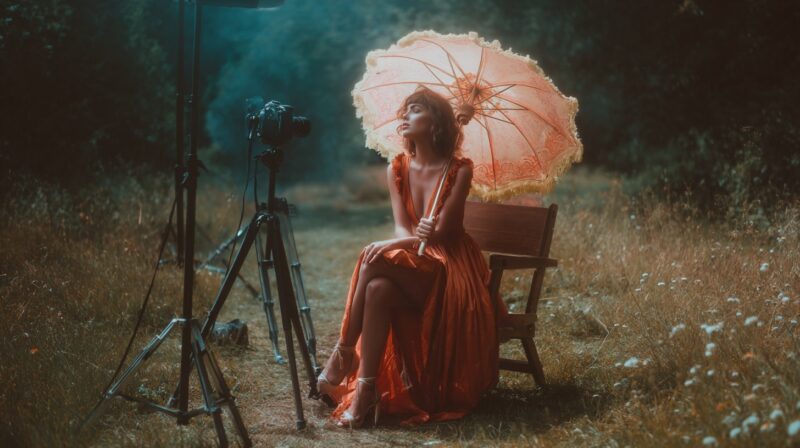
Outdoor setups bring spontaneity, creativity, and cost-efficiency into the photography workflow.
Natural lighting photography enhances the subject with soft, dynamic shadows and textures, often difficult to replicate in a studio.
Locations such as parks, alleys, beaches, and industrial zones offer endless visual elements that enrich storytelling. An open environment allows for experimentation with scale, movement, and framing.
However, outdoor shooting introduces challenges that require strategic planning.
Weather fluctuations, harsh sunlight, and distractions like wind or foot traffic can affect shoot quality. Scouting in advance helps evaluate light direction, foot traffic, and potential obstructions.
Equipment and Gear
Efficient outdoor shooting depends on mobility and gear reliability. Lightweight, collapsible backdrop stands allow easy transportation and quick assembly.
Spring clamps hold backdrops securely when wind becomes a factor.
Seamless paper rolls like Savage provide a studio-like background in natural settings, creating controlled contrast against ambient surroundings.
A carrying cart or backpack designed for photo gear streamlines movement between locations.
- Portable backdrop stands: foldable and adjustable
- Clamps: essential for securing materials in wind
- Savage seamless paper: neutral, consistent background tone
- Gear carts or bags: reduce setup fatigue during relocations
- Weighted bases: protect gear against sudden gusts
Lighting outdoors benefits from enhancement rather than replacement.
Fill flash balances shadows cast by harsh sun, while reflectors bounce existing light onto the subject.
Battery-powered strobes allow for more dramatic results without relying on power outlets.
Lighting Techniques
Outdoor light is powerful but inconsistent. Blending natural light with artificial sources helps maintain control without losing natural atmosphere. This can be quite tricky if you are into wildlife photography.
A north-facing wall or shaded area provides consistent, soft light for portraits.
Using feathered lighting improves diffusion and avoids harsh hotspots on the subject.
Scrims positioned above or beside the subject can filter sunlight during peak hours. Diffusers and white umbrellas help tame contrast and maintain detail.
Case Study Setup
A practical outdoor session may involve a concrete dividing wall as a base, with a Savage paper backdrop clipped to a crossbar between two weighted stands.
Speedlights placed at 45-degree angles light the subject, while a reflector bounces ambient light back into shadowed areas.
Background lights may be used to separate the subject if depth is limited.
With this setup, clean compositions can be achieved even in cluttered urban environments.
Consistency in light balance between strobes and ambient sources ensures skin tones remain natural while keeping the background exposure controlled.
Home Photography Background Setup
In-home photography studios benefit from maximizing available space. Small rooms can accommodate photography with compact setups.
Ceiling height may be limited, so rolling backdrop systems offer vertical flexibility.
Placing the subject near a window can supplement lighting with natural illumination.
Budget-Friendly Tips
Transforming a home space into a functional photo studio requires creativity and smart use of limited room. Most residential settings present constraints in ceiling height, available floor area, and ambient light control.
Even with such limitations, high-quality photography is achievable through clever configuration and gear selection.
Small rooms can become productive environments for headshots, product photography, or even full-body portraits with compact gear and collapsible solutions.
Keeping background systems mobile allows for multi-use of the room without disrupting everyday functionality.
Positioning setups near windows can supplement lighting during the day, though blackout curtains may be required for full control.
Lighting on a Budget
Creating a home studio doesn’t demand professional-grade expenses. Cost-effective tools and DIY setups can deliver impressive results when used properly.
Collapsible or microfiber backdrops offer quick setup, easy storage, and wrinkle-resistant material. Repurposing household furniture into props or risers saves money while adding layers to portrait scenes.
A curtain rod attached to the ceiling or a wall with brackets can serve as a makeshift backdrop holder.
PVC pipe rigs can also be used to build lightweight, custom-sized frames.
- Microfiber and collapsible backdrops reduce clutter and cost
- Curtain rods or PVC piping provide low-cost mounting options
- Dual-use furniture enhances set design and storage
- Household fabrics or painted cardboard can serve as DIY textures
Backdrops can also be painted sheets, neutral shower curtains, or printed paper.
Proper use of clamps ensures these alternatives remain wrinkle-free and presentable during shoots.
With a bit of creativity, home setups can emulate studio conditions effectively.
Backdrop Sizing Guide
Backdrop dimensions play a critical role in how a subject is framed and how the overall composition is perceived.
Selecting the right size ensures that the background complements the subject rather than competes with or overwhelms it.
The wrong size can result in awkward cropping, unwanted elements in the frame, or limited flexibility in posing and movement.
Several key factors affect backdrop selection:
- Subject type and size
- Number of people or objects in the frame
- Framing choice (tight, medium, or wide shots)
- Shooting environment (studio, outdoor, or home)
- Available wall and floor space
For individual portraits such as headshot photography, a width of 3 to 5 feet is typically sufficient. These dimensions frame the head and shoulders without including excessive negative space.
The tighter width also makes it easier to work in small studio or home environments, especially when using collapsible backdrops.
For full-body portraits, family sessions, or lifestyle shoots, a backdrop measuring 8 to 10 feet wide offers enough horizontal space for comfortable posing and walking shots.
Subjects can be positioned without their arms or feet touching the edge of the background, allowing for a more natural composition.
Group portraits, team photos, or commercial projects require significantly wider setups. Backdrops in the 10 to 20 feet range support wide-angle framing, multiple subjects, or larger product arrangements.
Summary
Backdrops act as visual anchors, enhancing storytelling through thoughtful composition. Studio, outdoor, or home setups each offer advantages and require gear tailored to their limitations.
Gravity Backdrops for photography offer a professional-grade option with consistency and visual texture.
Choosing wisely, maintaining carefully, and experimenting confidently enables photographers to create impactful imagery in any setting.