

Most rectangular conference tables with metal legs are relatively straightforward to assemble. The harder part of conference table installation is often everything that happens before the first bolt is tightened: receiving a heavy shipment, getting it through the building, protecting the tabletop and floor, and positioning the finished table safely.
For some offices, DIY conference table assembly makes perfect sense. For others, paying for inside delivery or professional furniture installation can prevent damage, delays and unnecessary lifting.
The right choice depends on the table’s construction, packed size and weight, the delivery route, available staff, and whether the table includes wiring, power modules or other components that make installation more complicated.
Know your delivery tier before delivery day
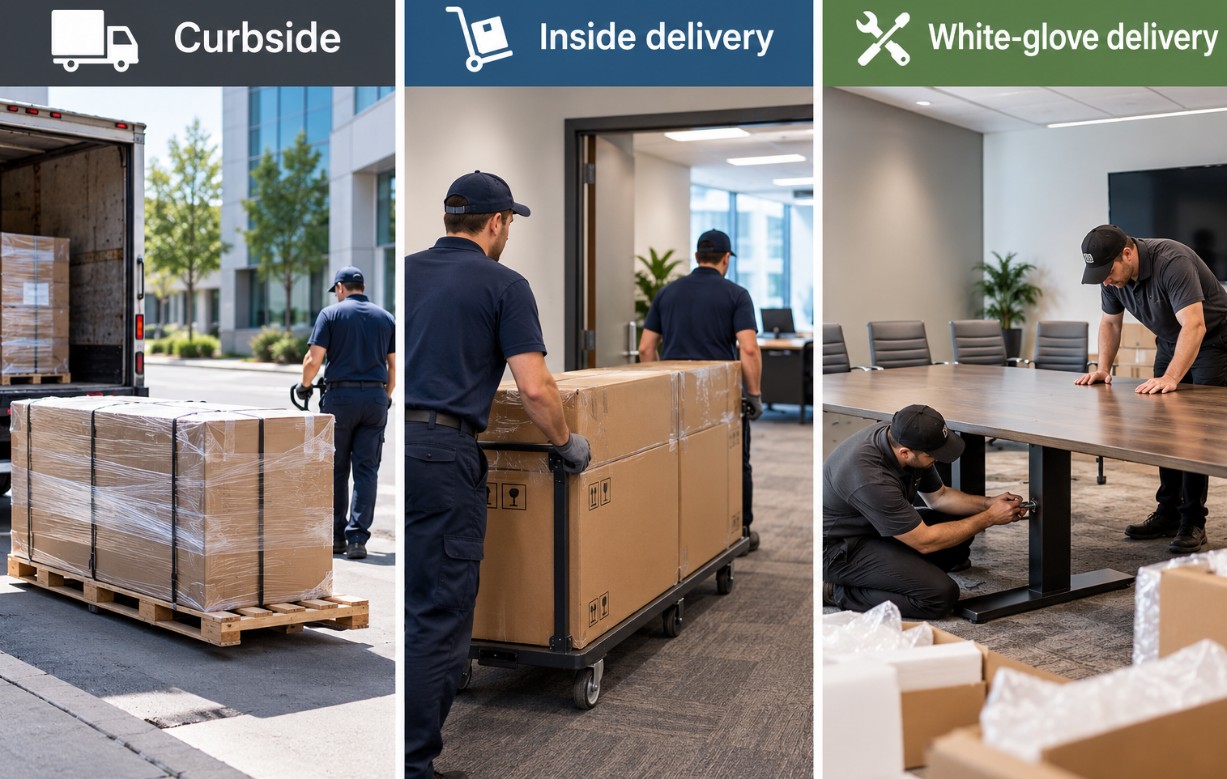
Delivery wording often causes more trouble than missing bolts. Curbside drop-off means the driver leaves the pallet at the dock or outside the building and drives away. You are then responsible for moving the shipment from that point, with no liftgate assistance unless you arranged it in advance.
Inside delivery is a step up because the freight crew brings the cartons to the conference room, but the crew will not assemble anything.
White-glove delivery goes further. The crew places the parts where you want them, and it will often build the table and take the packaging away.
Here is the practical difference:
| Delivery option | Where the shipment goes | Assembly included? | Best suited for |
|---|---|---|---|
| Curbside | Dock, curb or building exterior | No | Offices with their own receiving and moving equipment |
| Inside delivery | Designated room or interior location | Usually no | Teams willing to handle conference table assembly themselves |
| White-glove delivery | Final installation location | Often yes | Heavy, complex or time-sensitive office furniture installations |
Always confirm in writing what you paid for before the truck arrives. If your order says curbside and your conference room is up one floor with no freight elevator, you have a problem that an Allen wrench will not fix.
Some teams assume maintenance can muscle a table upstairs during a lunch break. That is how walls get gouged and backs get hurt. A better option is to pay for inside delivery at minimum, even if you plan to handle the assembly yourselves.
You keep control of the tools and timing without taking on the heaviest part of the lift. Treat delivery as part of the conference table installation plan, rather than as a separate errand.
Before approving a delivery quote, confirm:
- whether a liftgate is included,
- whether the crew will use stairs,
- where the cartons will actually be left,
- whether stair or long-carry surcharges apply,
- who removes pallets, cardboard and protective foam.
A five-minute call can prevent a two-hour standoff at the dock when the driver will not move the shipment beyond the curb.
Measure the path, not just the room
Do not measure only the conference room and assume the box will find its way there.
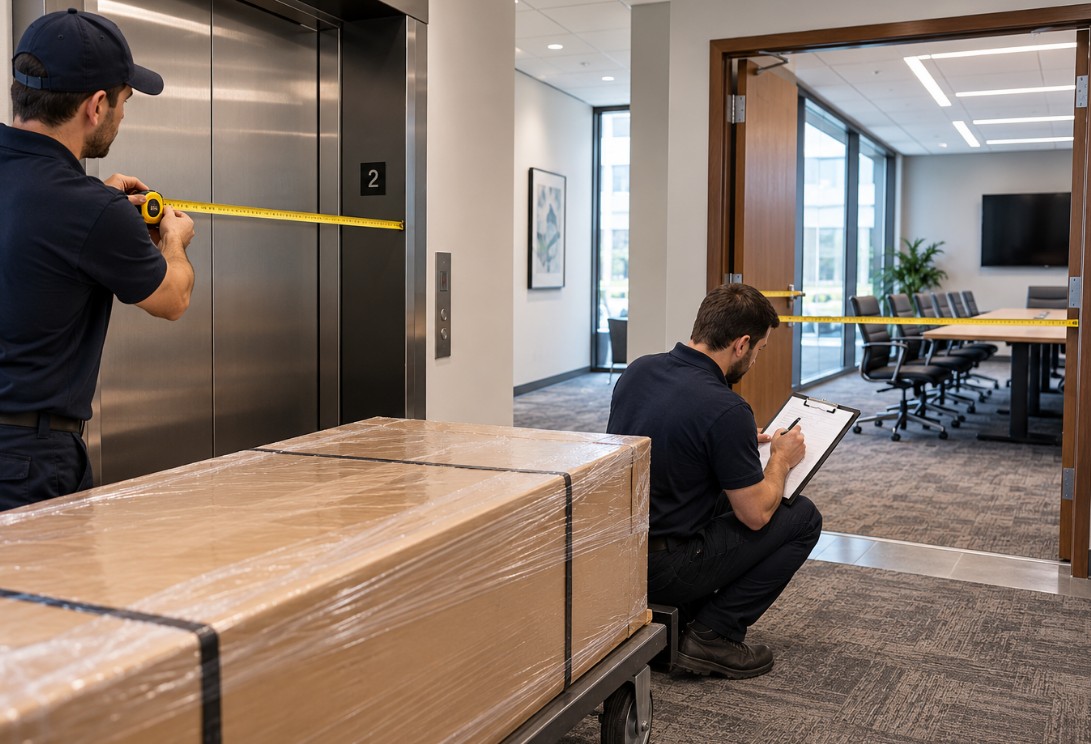
Walk the full route from the loading dock to the final position, noting every tight turn and narrow doorway that could stop a long carton.
Freight elevators and standard elevators have different weight limits and door widths. Hallways that look wide can quickly become restrictive once door frames and exit signs intrude. Corners are a common failure point because a long tabletop cannot pivot like a chair.
Before delivery, record:
- packed tabletop length, width and thickness,
- every doorway width and height,
- elevator door and interior dimensions,
- elevator weight capacity,
- diagonal clearance around tight corners,
- stairs or level changes along the route.
Follow the carrier’s handling guidance and the employer’s safety procedures when deciding how many people and what moving equipment the job requires.
A suitable furniture dolly can make the level portions of the route easier to manage. A liftgate on the truck also matters when there is no loading dock.
Lay floor protection along the route before the box moves an inch. Hard wheels and bare laminate floors are a bad combination, and a scratched hallway is harder to fix than a scratched table leg.
Keep the top in its carton until the base is set to reduce the risk of dings and dust.
Let construction type set your plan
Conference tables do not all go together in the same way. Older wood tables often rely on cam lock fasteners and fixed modesty panels that require careful alignment and extra steps. Those locks can loosen with repeated disassembly, while glued panels leave little room for error.
Powder-coated steel legs look tough, but they can scratch when metal rubs against metal during unboxing. Laminate and MDF tops may chip at the edges if you drag them or stand them on end. With these tables, build quality matters more than advanced skill with tools.
Ready-to-assemble furniture depends heavily on the quality of its hardware and the clarity of its instructions. Before choosing a rectangular conference table with metal legs, request the assembly guide, packed dimensions and component weights. Check whether the top arrives in one piece, whether the legs and supports use pre-drilled connections, and whether power modules or modesty panels add extra steps.
Use the tools and number of installers specified by the manufacturer. Lay out every labeled part before starting, compare the hardware with the parts list and contact the seller if anything is missing. This preparation is more reliable than assuming that every metal-leg table uses the same attachment method or takes the same amount of time.
Add up the real cost of DIY conference table installation
DIY looks free until you price staff time.
The actual cost includes more than the minutes spent tightening bolts. Add the time required for:
- receiving the shipment,
- moving cartons through the building,
- unboxing and checking components,
- assembling the conference table,
- leveling and positioning it,
- installing or routing cables,
- removing packaging,
- cleaning the room afterward.
Multiply those hours by the organization’s loaded labor cost and compare the result with written professional furniture installation quotes. Also consider the work those employees would otherwise complete during the same period.
The calculation may show that DIY conference table assembly is economical, or that professional help offers better value.
You do not have to buy full white-glove service every time. A qualified local furniture installer or handyman can provide a middle ground between staff assembly and full white-glove service. Request proof of relevant experience, insurance where appropriate and a written scope before booking.
The hybrid route suits many offices: pay for inside delivery so the heavy cartons reach the conference room, then build the table with your own crew or bring in an installer for assembly.
This reduces risk during the most demanding part of the move while avoiding unnecessary service costs.
Schedule the build when the room is free and the hallways are quiet so you are not dodging meetings with a tabletop on a dolly. Early morning can work well because elevators are more likely to be open and the installation is less likely to disrupt other employees.
Include packaging removal when comparing quotes. A professional crew may haul away pallets and foam. A DIY installation leaves you breaking down boxes and finding suitable disposal space.
DIY or professional installation: which makes more sense?
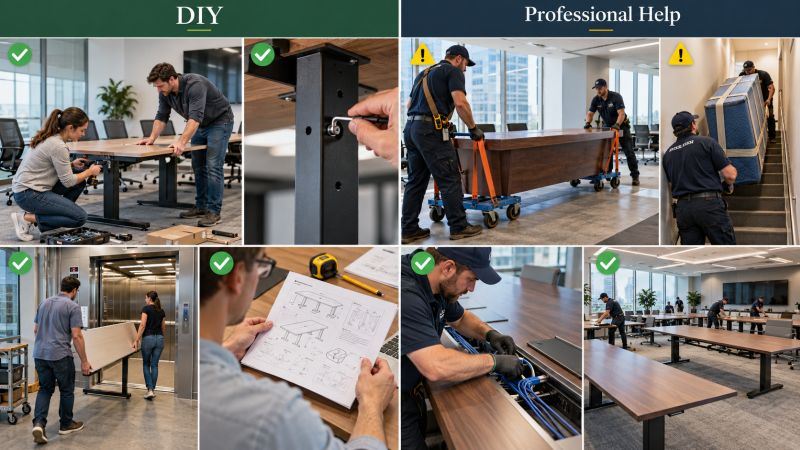
A quick comparison can make the decision easier.
| Situation | DIY may work well | Professional help may be better |
|---|---|---|
| Small modular table | Yes | Usually unnecessary |
| Heavy one-piece tabletop | Possible with proper equipment | Often |
| Tight stairs or narrow turns | Higher risk | Yes |
| Freight elevator available | Easier | Depends on weight |
| Integrated power and data | Depends on experience | Often |
| Several tables installed at once | Can consume significant staff time | Often more efficient |
| Simple pre-drilled metal base | Usually | Optional |
| Limited staff or moving equipment | No | Yes |
The cost of professional installation is easier to justify when access, weight or wiring increases the consequences of a mistake.
Avoid the mistakes that wreck metal-leg tables
Most problems during metal-leg conference table assembly come from handling and fastening rather than from complicated tools.
Do not over-tighten the hardware
Over-tightening can damage threaded inserts or hardware, while under-tightening can leave the table unstable.
Follow the manufacturer’s stated tool and torque instructions rather than relying on feel. If no tightening sequence is shown, ask the seller instead of improvising.
Recheck each connection after the table is upright, taking care not to exceed the specified torque.
Do not use an impact driver unless the assembly instructions explicitly permit it.
Protect the tabletop from the start
Laminate and MDF surfaces scratch quickly, while edge banding can chip if you slide the top across concrete or tile.
Build on cardboard or moving blankets, never on a bare floor. Keep the top face-down until the legs and frame are fixed. Lift rather than drag when you flip it over.
Protect powder-coated legs too
Powder-coated steel legs can scuff when tools or other legs rub against them.
Keep each leg wrapped until you are ready to bolt it on.
Do not ignore a wobble
If the finished table wobbles, first check the floor, leveling glides and assembly instructions.
A twisted frame or unevenly tightened connection may require the bolts to be loosened and reset in the specified order, but damaged hardware should be referred to the seller or installer.
Position, level and wire before you call it done
Final placement is part of conference room table installation.
Route power and data cables through the grommets and wire trays before you push the table into its final position. Fishing cables through after the table is loaded with monitors is miserable work.
Leave service slack under the table so cleaning staff do not pull the connections loose.
Set the leveling glides next. Most quality tables have adjustable feet that compensate for uneven slabs. Turn each glide until the top stops rocking, then check it with a level across both its length and width.
Do not leave the glides loose because the table may shift over time. Small turns can make a noticeable difference.
Check the surface height and knee space at the end. Compare the finished setup with the specified dimensions, the chairs being used and applicable accessibility requirements.
Test each seating position rather than assuming a standard measurement will suit every user.
Before calling the installation complete:
- sit in every seating position,
- check the table for wobble,
- confirm outlets and grommets are accessible,
- test power connections where applicable,
- make sure cables do not cross walkways,
- push every chair back and check circulation space.
If the room has floor boxes, align the table base so the grommets sit over them without stretching the cables. That alignment can prevent extension cords from being run across walkways later.
A clean installation is not much use if people cannot move around once every chair is occupied.
Use warranty and checks to decide who should build
Read the warranty language before you pick up a wrench.
Some manufacturers limit structural coverage if the assembly was completed incorrectly. Others may ask for photos and receipts when a power unit is involved.
A quick email to support can help prevent a dispute later.
Use published testing and certification information as part of the quality check. If a seller cites an ANSI/BIFMA standard, confirm which table components and model configurations were tested, and review the applicable standard rather than relying only on a brief marketing summary.
Testing does not replace correct handling and assembly.
DIY conference table installation checklist
If you can answer yes to most of these points, DIY is more likely to be reasonable:
- You have the people and moving equipment required by the shipment’s handling guidance.
- The packed components fit through every doorway, turn and elevator on the route.
- The conference table assembly guide matches your team’s tools and experience.
- You have a protected area large enough to assemble the table safely.
- The schedule includes enough time for moving, assembly, leveling, wiring and cleanup.
- You understand any warranty requirements related to assembly.
- Someone on the team can inspect the finished table before it is put into service.
If several of those answers are no, professional installation may cost less than correcting damage or restarting an incomplete build.
Keep photos of each step and save the instructions with the receipt. Documentation helps if you ever need to file a claim for a loose frame or dead outlet.
It also makes the next move faster and gives another installer a clear record of the original assembly.
Final decision: DIY or professional help?
DIY conference table installation works well when the table is modular, the delivery path is clear, the assembly instructions are straightforward and your team has the required people and equipment.
Professional help becomes more attractive when the tabletop is especially large or heavy, the route includes stairs or tight corners, several tables must be installed at once, or integrated power and data add another layer of work.
For many offices, the best answer is somewhere in between. Inside delivery can remove the riskiest part of the job while leaving straightforward conference table assembly to your own team.
The important thing is to make that decision before delivery day. Once a several-hundred-pound shipment is sitting at the curb, your options become much more limited.